

UAL Level 3, Unit 9, at Richmond Art College.
Digital imaging and printing
LO1 Understand digital imaging and printing.
LO2 Be able to produce digital images and prints.
Task 1
I prepared and printed two photographic images to exhibit, using Photoshop to enhance and sharpen the image where necessary, to optimise levels and to achieve the required resolution for the size of prints needed.
I chose two images from the ‘intimate portrait’ photographic project earlier in the year.
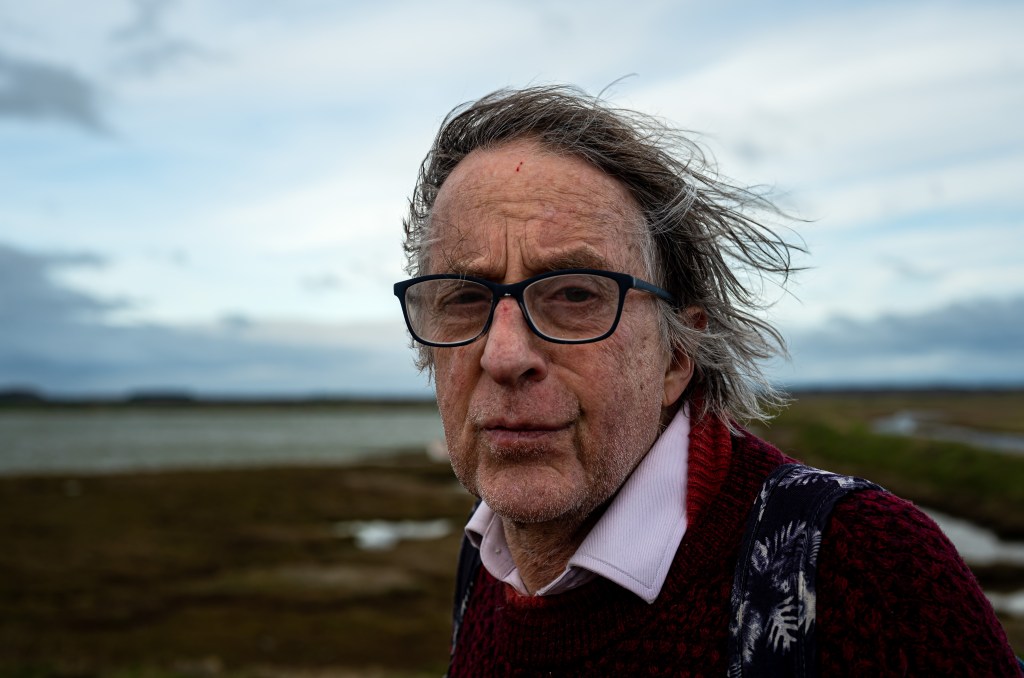
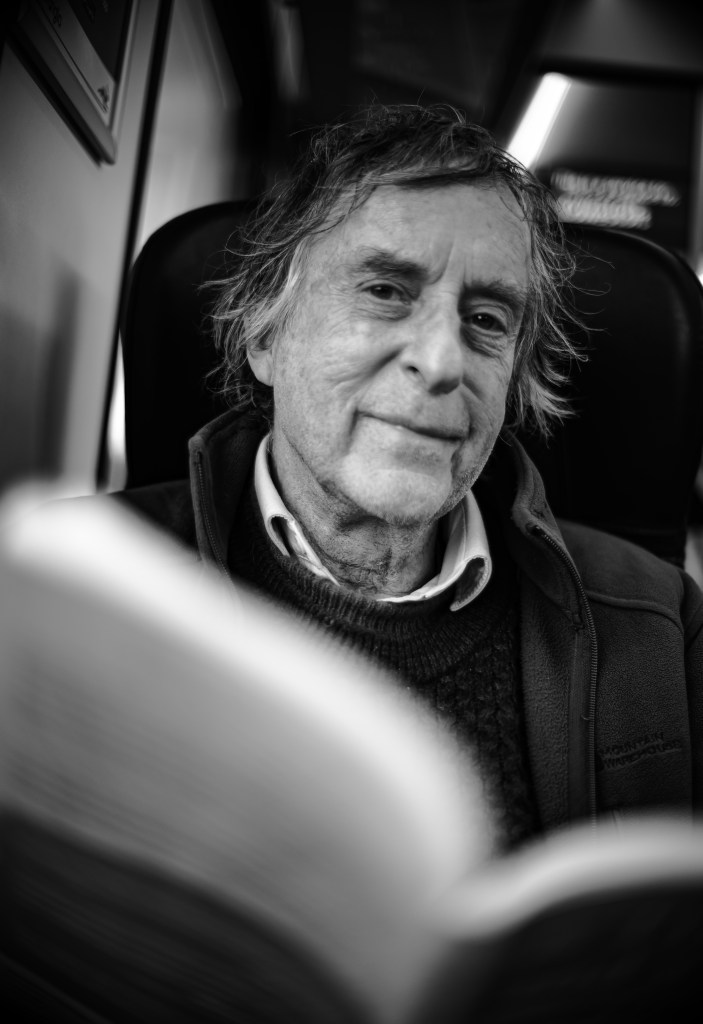
I chose these images because they seemed to be an accurate representation of the subject, the playwright, author and musician Alan Franks. They evoke both his personality as well as the sense of place. It was important to me that he liked the pictures. I also liked the composition, quality, mood, sharpness, depth of field and character of both images which I felt conveyed a sense of who he is, even to someone who does not know him.
I was pleased with the quality of print, colour management and surface but would perhaps have liked a wider choice of paper quality so next time will be more adventurous in choice of print paper.
When preparing these digital files for printing, a crucial consideration was DPI, or dots per inch, which determines the level of detail and sharpness in a printed image. Higher DPI means more detailed and clearer prints, and the possibility thereby of larger prints.
The top picture I printed at A2 size and the bottom one at A3 for exhibition. In the end I opted for a high street printer because I preferred to oversee the process in person. I used matt paper.
In retrospect, I would have preferred a wider choice of paper although I was pleased with the quality of colour reproduction. In future, I will source a firm of art printers that I can visit in person to print for photo club competitions and any other exhibitions I might be fortunate enough to take part in.
For someone of my vintage (dob 1959) it has been necessary to get to grips with the move from analogue to digital that has taken place in photography, along with much else in life, in recent years.
A digital file is an electronic representation of data that can be stored, transmitted, and manipulated using a computer programme such as those supplied by Adobe – Lightroom, Photoshop and so on. My preference is to use Photoshop.
Digital files are composed of binary code – 0s and 1s – which can represent text, audio and video as well as images.
This contrasts with traditional analogue formats, which I used with my old (sadly stolen) Zenit E film camera and from which I learned to develop film in a darkroom using traditional methods during my HND in communications and business studies at the London College of Printing (now part of UAL) in 1981.
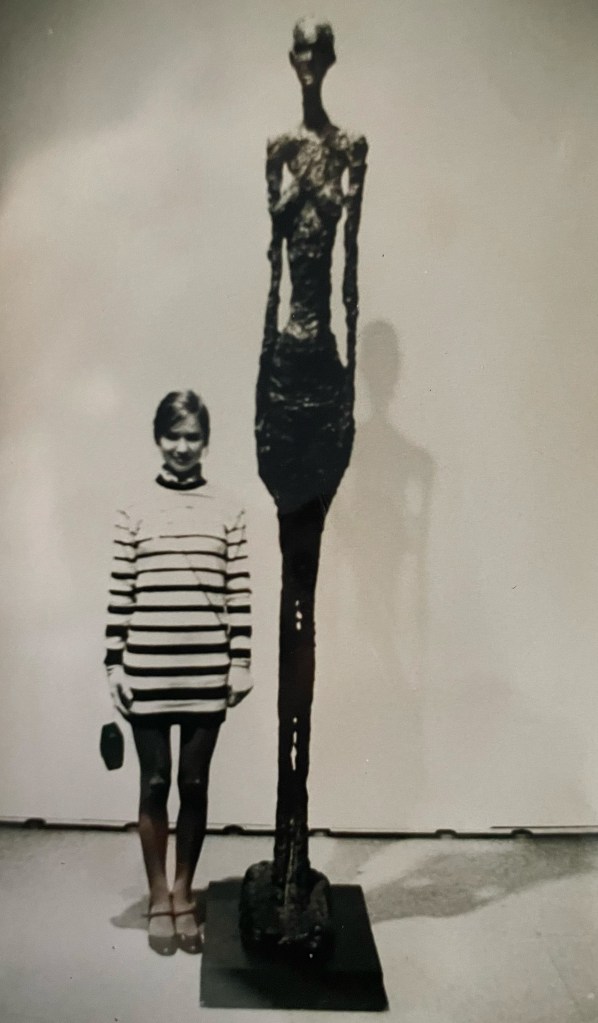
This is an image I took using a tripod and the Zenit E in the Louvre, Paris in 1981 of myself next to a Giacometti sculpture. (I was at that time in something of an anorexic phase so rather identified with these works.) I developed the negatives and printed the photograph myself back in London at the London College of Printing, at the Elephant and Castle. The Zenit E was a beautiful camera and at the time I was pleased with the focus of this print, but revisiting it now, it is clear the sharpness leaves a lot to be desired.
To reproduce the image here I simply snapped the original print on my iPhone and have not enhanced in processing, to give as good as possible a representation of what it looks like in real life.
There is something beautiful about analogue, and the sense of nostalgia it evokes along with the retro style is always powerful. Modern digital imaging is in a different class, of course, in terms of sharpness and overall quality.
Even now, though, photography has not changed in one vital respect: there is rarely a second chance to capture that ‘decisive moment’, whether using the latest mirrorless at a fast-moving jazz gig in London in 2023, or painstakingly working with an antique Russian analogue camera during a sedate walk through an unmoving art gallery in Paris in 1981.
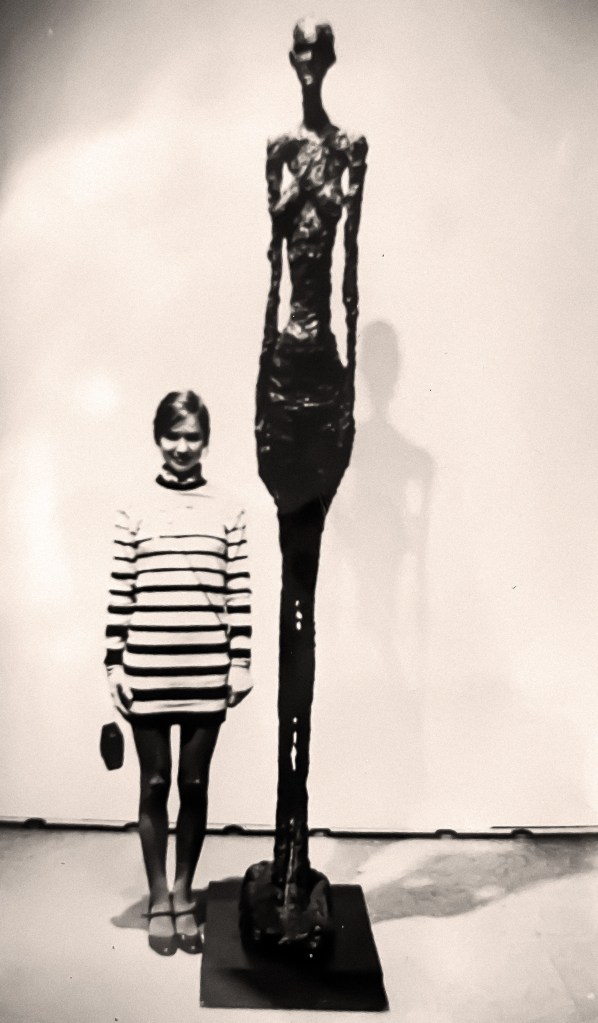
This is the image, sharpened in Photoshop Beta and with a gentle sepia tint applied.
It is important to be able to identify the characteristics of digital imaging and printing when processing images, among the most important requirements being resolution and image quality, where accurate focus is essential as well as using tools such as using straightening options in Photoshop can be a must. For most requirements, pictures must be in focus, correctly exposed, oriented correctly and have high resolution. Sometimes, some of this can be corrected. But not always.

This is an example of a digital image that I had to process in the knowledge it could likely be needed for high-quality printing for marketing purposes. The full set of images from this commissioned work is on Flickr here. Taken at 125 with a 70-300mm zoom lens with an adapter to fit it to the Nikon Z6II, at 4000 ISO at F8, the images, NEFs accessed first from the camera via Adobe Bridge in Raw, needed some traditional enhancement using tools in Raw and Photoshop, such as checking levels, orientation, exposure and white balance.
Beyond this, however, this was the first time I found myself in an optimal position to use the new AI feature in Photoshop to aid enhancement. I needed the best resolution possible to optimise for the client’s marketing needs. The AI-assisted enhancement offered in Photoshop Beta was a cut above the traditional sharpening and noise-reduction tools in Photoshop. Using AI in imaging remains controversial, but in my view, AI for digital enhancement is a permissible use of this new technology, while taking into account ethical and other necessary parameters.
The images in this job that were enhanced using the AI were of higher quality than when I tried first with the traditional tools, in particular concerning resolution, which offers great potential for the future when photographing in sub-optimal lighting conditions at a public or other event where a flash is not desirable so ISO must be set high. When it involves people who can be moving around at relatively high speed, thus needing a faster shutter speed, such as this event, then new enhancement tools such as this really do come into their own when images are needed for marketing which can involve printing large images or other large-scale use of digital images, eg on a hoarding or screen.
Producing digital images of varying sizes is also often essential when entering photo club competitions, for example. I learned how to adjust size and quality in Photoshop to achieve the required outcome, whether for print exhibition or digital display. I learned to resize images in Photoshop to meet the precise required sizes needed in terms of width, height and DPI for printing for framed exhibition, for example in a public display or at a camera club competition.
The music event, above, was an example of a job where different types of images were needed for different uses. In Photoshop, using Raw via Adobe Bridge I converted all the NEF images into Jpegs – compressed files with some data removed. For social media such as Instagram, Facebook and Twitter I made relatively small Jpegs. For the client I maxed them out and also posted the maximum size on Flickr to enable the client to download a variety of resolutions according to their preference.
NEF (Nikon RAW) files contain the maximum amount of unprocessed and uncompressed data captured directly by a digital camera’s sensor, which in the case of the full-frame Nikon mirrorless range adds up to a huge amount of data. (One further consequence of all this is I have had to learn how to use and access remote storage and back-up techniques.) RAW files preserve all the information captured during the shoot, which is great because of the great flexibility it gives in post-processing. Jpegs are still useful to have however because they can easily be uploaded direct from the camera to a phone and used to assess composition or sharpness, to post quickly across social media and to demonstrate results quickly to a client without needing immediate access to a laptop or other processing tools.
LO3 Understand photographic practice and health and safety procedures.
It is important safe working practices within digital production facilities. eg when working with computers, with cutting equipment.
Beyond the requirements listed in Levels 6, 7 and 8, the following should be noted:
- Working with computer screens in processing, alongside extremes of lighting set-ups including natural bright light, can easily damage eyesight if care is not taken. Regular breaks should be taken from the screen, and if necessary protection worn to shield the eyes.
- Trimming prints to size has obvious risks in terms of hazards to fingers and hands. Great care must be taken doing this, and children as well as other adults should be safeguarded by being kept well away from any such equipment in use.
- When working with glues, or even, albeit rarely, with traditional developing materials, or enhancement materials such as unusually-coloured paint for example, some liquids can be toxic. Great care must be taken when handling these, particularly in terms of inhalation and touch.

Clever Placement. These pics are absolute beauties. X
LikeLiked by 1 person